 Home
Home
If we begin with certainties, we shall end in doubts; but if we begin with doubts,
and are patient in them, we shall end in certainties.
Francis Bacon
Day 1: DNA manipulation
Additional Reading
- The second wave of synthetic biology, P. Purnick
and R. Weiss (Nat
Rev Mol Cell Biol 2009,
10(6):410-422)
- Life from information, C. Voigt (Nat Methods 2008,
5(1):27-28)
- Streamlined engineering for synthetic biology, J.
Perkel (Nat
Methods 2013,10:39-42)
Overview of Experiment
This lab session focuses on several procedures commonly used in molecular
biology: plasmid DNA isolation; restriction digests of DNA (one
opens up a vector and the other generates an insert); phosphatase
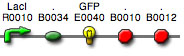
treatment of digested vector. Today you begin working with two BioBricks™: BBa_R0040 and BBa_E0840. Visit the Registry of Standard Biological Parts for additional information about BioBricks™.
Background
General Guidelines
- Maintain a clean work area
- Use a fresh pipet tip for every transfer (tips
should be DNase/RNase free)
- Wear gloves to prevent nuclease contamination (and to protect
yourself!)
- Sterilize solids and liquids by autoclaving 20 minutes at 121°C at 15 psi
Pipetting Small Volumes
- Before beginning the procedure, thaw all frozen
reagents and mix well
- Pulse spin ALL tubes of aliquots
to bring the liquid to the bottom of the tube -- in the microcentrifuge
hold the "SHORT" key for about
5-10 seconds
(Capless 1.5 ml vials serve as holders for 0.2 and 0.5 ml tubes
in the microcentrifuge rotors)
- Touch only the very tip to the surface of the solution
(i.e., do NOT submerge the pipet tip into the solution)
- Most enzyme stocks are in 50% glycerol; these solutions
are quite viscous and liquid will stick to the outside of
the pipet tip so touch only the surface
Centrifugation
- DO NOT PUT TAPE ON TUBES!
- ALWAYS balance the load in the centrifuge
- Capless 1.5 ml vials serve as holders for 0.2 and 0.5 ml
tubes in the rotors
- Pulse spin ALL tubes of aliquots
to bring the liquid to the bottom of the tube -- in the microcentrifuge
hold the "SHORT" key
for about 5-10 seconds
- Don't forget the cover for the rotor
- DO NOT SLAM THE LIDS! (this action breaks the latch mechanisms)
Plasmid DNA mini prep
We're using a Zyppy™ Plasmid
Miniprep Kit (Catalog No. D4036, Zymo Research Corp.,
Orange, CA) to isolate plasmid DNA from 3 ml overnight (O/N)
bacterial cultures of R0040 and E0840; each team will isolate
DNA from each culture.
Disposal of Bacterial Waste:
- Discard bacterial supernatant in a small beaker; add bleach to 10% for 10 minutes before dumping into the sewer
- Collect contaminated tips and culture tubes in a beaker at your desk then rinse the beaker with bleach after dumping the waste in the clear Biohazards bag; these bags will be autoclaved prior to placement in the household trash
- After the bacteria are lysed, tips, vials, and other materials should be discarded in the regular trash
PROTOCOL (adapted from the Zyppy™ Plasmid
Miniprep Kit INSTRUCTION MANUAL):
- Centrifuge 1.5 ml of bacterial culture for 30 seconds at
maximum speed (in a microcentrifuge); discard the supernatant
(into small waste beaker)
- REPEAT step 1 (in the same tube).
NOTE: typically you would save a small amount of culture to streak a plate and prepare a fresh overnight for a glycerol stock; bacterial cultures can be stored indefinitely at -80°C without significant loss of viability in media containing at least 15% glycerol (v/v).
- Add 600 µl nuclease-free water (NF H2O) to the cell pellet and resuspend completely by gently pipetting up and down
- Add 100 µl of 7X Lysis Buffer (Blue) and mix by
inverting tube 6 times
- Complete lysis is indicated when the solution changes from
opaque to clear blue
- You must proceed to step 5 within 2 minutes (excessive lysis can denature plasmid DNA!)
- Add 350 µl COLD Neutralization Buffer (Yellow),
containing 100 µg/ml RNaseA, and mix thoroughly by inverting
tube
- When neutralization is complete, sample turns yellow and a yellowish precipitate forms
- Invert sample 2-3 more times (to ensure complete neutralization)
- Centrifuge at 16,000 x g for 4 minutes
- Transfer supernatant to a Zymo-Spin™ II column (avoid disturbing pellet!)
- Put column in a 2 ml collection tube and centrifuge
for 15 seconds (maximum speed, press and hold the "short" button)
- Discard flow-through and put column back into the collection tube
- Add 200 µl Endo-Wash Buffer to column and centrifuge
for 15 seconds (maximum speed, press and hold the "short" button)
- Add 400 µl Zyppy™ Wash Buffer (containing ethanol) to the column and centrifuge for 30 seconds (maximum speed)
- Discard flow-through and centrifuge at 16,000 x g for an
additional 15 seconds to remove the last drop of wash from
the column (residual ethanol will inhibit DNA elution)
- Transfer column into a sterile 1.5 ml tube
- Add 30 µl Zyppy™ Elution Buffer (10 mM Tris-HCl, pH
8.5, 0.1 mM EDTA) directly to the column matrix and wait one
minute (room temperature)
- Centrifuge 15 seconds (maximum speed, press and hold the "short" button) to elute plasmid
DNA
Restriction enzyme digests of BioBrick™ plasmids
You perform a double digest on
R0040 and E0840;
you also set up an uncut control for R0040 plasmid.
On lab day 2, you will gel purify the insert from E0840,
ligate this fragment to R0040 vector that has been phosphatased
and gel purified, and transform competent bacteria with the
new construct.
Our restriction enzymes are from New
England Biolabs (NEB): record the units/µl
for each enzyme you use; enzyme concentrations and CutSmart™ Buffer can be found on NEB's web site (see links below). You can use
the Double
Digest Finder tool at NEB to select optimal reaction
conditions for any two NEB restriction enzymes; a compromise
in digestion efficiency of one enzyme may be necessary for certain
double digests. Each team should set up the following
reactions in 1.5 ml tubes:
- Put 10 µl plasmid DNA (mini
prep) in one tube for
the E0840 double digest and 10 µl plasmid
DNA in one tube for the R0040
double digest; put 5 µl R0040
plasmid DNA in a 3rd tube for an uncut
control
(store the rest of your plasmid DNA at -20°C)
- Add 6 µl NF H2O to R0040 double digest; add
6 µl
NF H2O
to E0840 double digest;
add 13 µl NF H2O
to uncut control (for
a final volume of 20 µl)
- Add 2 µl 10X NEB CutSmart™ Buffer (10X) to
each tube
- Add
- Gently flick tube to mix and pulse spin
- Incubate at 37°C for at least 15 minutes ("dry" heat
block)
- Pulse-spin all samples
- R0040 digest: proceed to phosphatase treatment of vector DNA
- R0040 uncut and E0840 digest: heat inactivate
restriction enzymes as in step 8
- Incubate R0040 uncut and E0840 digest at
80°C
(oven) for 20 minutes
- Pulse spin heat-inactivated samples
and store at -20°C (in a benchtop cooler) until
day 2
Phosphatase treatment of vector DNA
Treating the digested vector DNA with phosphatase decreases
recircularization by removing both of the 5' phosphates required
for ligation so that only a molecule with a 5' phosphate at each
end (untreated insert fragment) will be ligated. Theoretically,
R0040 should not be able to recircularize since two enzymes with
"sticky ends" were used; however, if some of the DNA
is cut at just one of the restriction sites, the vector can recircularize--digestion
with SpeI and PstI only removes a small spacer between the sites
so you cannot see a size difference between single cut vs double
cut DNA on an agarose gel.
We routinely treat linearized vectors with alkaline phosphatase
to decrease the background in ligation/transformation procedures.
- Add 2 µl (1 unit/µl) Shrimp
Alkaline Phosphatase (rSAP) (NEB,
catalog # M0371S) to R0040
digest; gently mix and pulse spin sample
- Incubate 30-60 minutes at 37°C ("dry" heat block)
- Pulse spin and store at -20°C (in a benchtop cooler)
until day 2
- Lab day 2: Heat inactivate at 80°C
for 20 minutes (while agarose gel is cooling)
Copyright, Acknowledgements,
and Intended Use
Created by B. Beason (bbeason@rice.edu), Rice University, 21 November 2007
Updated 16 October 2014